Translate

Tuesday, December 10, 2013

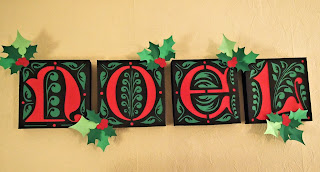
 Christmas Wall Hanging and Lantern

 For the first time, I put my digital designs on Etsy.

Check them out at: 
https://www.etsy.com/shop/Gordonsstudio?ref=search_shop

They are both very simple to assemble.  I really simplified the Lanterns by using copies of the figures, rather than make them part of the digital cutting file.  The Lantern frame is easy and simple enough to cut with and Exacto knife.  Let me know how you like them?


I love a challenge, if you have something you would like designed?  send me a note.

Tuesday, October 1, 2013

Burlap Wreath


My Daughter-in-law loves things made with burlap. So, I made her a burlap wreath.  I love to make her happy.  I looked at many, many wreaths on Pinterest, but could not find one I really liked.  I decided to do ruffles.  It took three widths of of 8 inch wide, and three widths of 6 inch wide.  I just pulled up a burlap thread to ruffle.  I used a wire wreath, and sewed the 8 inch ruffle directly to the middle top, two wires.  I sewed the 6 inch ruffle to the middle of the 8 inch ruffle.  I used a large embroidery needle, and pulled burlap thread.  Really pretty easy.  I did not attach the flowers permanently, I thought she could easily change the decorations through the seasons.


I also made her a burlap table runner.


Wednesday, September 18, 2013

Halloween Crafts

I love Halloween, but at 67, I do smaller things now.  Here are two lanterns I designed for my daughter-in-law.  She loves to decorate for holidays.


I am doing some other things, will post at later time.

Friday, August 9, 2013

Graduation Centerpiece and Gift Card Box


This graduation color scheme, obviously, was green and white.  A very boring, and tough to work with simple color scheme. I customized the Popcorn box center pieces (designed for May's school fundraiser from a previous post) with the Grad's Name and School Name.  I used floralytes (2) to light them and added a lattice lid.  They look great on the green tablecloths, especially when they turned down the lights later in the evening, for dancing.

The card box cake was just a bit of whimsy, I have no idea how it popped into my head.  It was a nice centerpiece on a table with the Grad's photos and awards.

I have included a FREE pattern of a popcorn box that can be made in any color, for all types of celebrations. 
Pop Corn Centerpiece

Directions:
After cutting out four sides of box, mark and emboss the fold lines.  Glue 3 sides together.  On the reverse side, spray with adhesive, and lay on white drawing paper.  (Roll can be purchased at craft or art stores.)  Cut the white paper along the edges of the popcorn box.  Glue the remaining side fold to create the four-sided box.  I use foam board as the base.  Cut an approximate 4.75 inch square.  Fold the bottom flaps in towards the box.  From the top of the box, I put hot glue on the inside of the flaps, and lower the base right on top of the flaps.  Put a couple of floralytes in and it glows.  You could also adhere the

flattened box to the paper side of freezer paper, and use for actual popcorn.  The waxed side of the freezer paper will keep the oils from leaking through.  Enjoy!

Monday, June 24, 2013

Another Wedding Gift Box for a Halloween Wedding

Haven't posted for a while, having a quiet time.  One of retirement's blessings.  Here is a Halloween/Wedding box I made for a special couple.  It is one of my favorites.  I Love Tim Burton!


Saturday, June 1, 2013

Yahoo!  I have a follower!  My first one, and I want to let her know that I am thrilled.  So I figure I need to post more often, just for her.

 Wedding Gift Box in Damask

A friend had a black and white, damask themed, wedding.  I created a Gift Card Box and Pew decorations with the damask theme.  For the box, I picked up three decorated, cardboard luggage pieces, at Tuesday Morning.  (Lots of  stores have these)  The hardware was different on each, so I painted them all black.  I made the paper patterns, and printed them on 13 x 19 coated paper from Red River Paper.  I use Corel Draw software for design.  Since this is pretty specialized, I think it can be done with wrapping paper or with wall paper.  The bridal shoe is a pattern I made for a previous event.  I also made a black groom's shoe, but I did not get a picture of that. 


Church Pew Decoration

For this, I used a rose pattern from ellinee.com/.   I just used white copy paper.  Since I had to make so many roses, I created a file for my Pazzle paper cutting machine.  I hot glued them, about 8 each, to a styrofoam ball. Then I used a circle printed in damask, and a paper doily to wrap a cardboard cone. Not hard, just time consuming when you make 80 roses.
 

Saturday, May 11, 2013

Wedding Card Box

I have created numerous Card Boxes for various occasions,  this one was everyone's favorite.  I started with 2 sets (six each) of Kraft book boxes, in descending sizes, and two seated cherubs, bought at the local craft store.  For texture on the books, I decoupaged paper towels on the covers then painted and sponged painted them.  I sprayed one-ply corrugated sheets in gold, and glued them to the side edges of the books, to give the impression of book pages.  I added some gold touches to the cherubs and books.  I created the large book in the center out of kraft board.  For the book titles, I lightly sponged painted a piece of 2-ply paper towel.  I ironed it to a piece of freezer paper, and put it in my printer, and printed the Titles.  Then I separated the 2-ply, giving me a thin sheet of paper towel.  I sprayed it with a fixative, and decoupaged it to the books.  I cut a slot in the top of two boxes for the cards.  Then, I glued the cherubs to the stack of three small books,  to make book ends.  I am trying to cut down on clutter, and I am going to put it on Pinterest.  Thanks for looking!


Wednesday, May 1, 2013

School Project Quilt

QUILT AUCTION, 3rd GRADE

I haven't posted for a while, so I went searching my files for past creations.  The quilt blocks were done by each child in the Third Grade.  Of course, Gram was enlisted to make the quilt.  I decided on primary colors (ROYBG) with a 'Bart Simpson' pattern on a black background for contrast.  There were five classes of 20 each, and each class had one color.  In Art Class, each child was given a black permanent marker to do a small piece of art work that they related to their life, as a third-grader.  I called it a time capsule.  The teachers and principle also made blocks.  I needed more, so I did some contemporary icons, like President Obama, Ipod,  Spongebob, etc.  I did the back in 12" color blocks. 

Total cost was about $100.  It was a big hit in the auction. I think this idea could be used for family, special events, a commemoration, etc.


This is the pattern I created to figure out the blocking:


Wednesday, March 27, 2013

 Hooray for Hollywood!

Well, another Fashion Show /Fundraiser came around.  This year's theme was "Lights, Camera, Fashion!"  Hollywood, Oscars, and Film Stars were the decorative theme.  I envisioned a Forties Hollywood Art Deco theme.  The venue had art deco decor.  Once again, trying to keep the cost of centerpieces below five dollars, I used foam board and paper to create the Art Deco/Oscar themed lamp (20) and lighted Popcorn Box.  The shade is 25 separate pieces, and cut out on the Pazzles cutting machine.  I used 'toile' patterned tissue paper as the "glass."  It only took me two practice patterns, to get the final design.  The lamp base is "Oscar" in  black foam board.  I put two "floralytes" in each to give them light.  


I had lamps everywhere!  Here are some other decorations I designed:


Unfortunately, my camera had difficulty with the lighting, so here are pics I took at home:


A good time was had by one and all!  The talented "Set Crew" did a beautiful job with the Chinese Auction and Silent Auction Tables.  It was organized so beautifully and ran perfectly.   My daughter-in-law and her BFF were the Producer and Director of the event.  

I am considering putting the lamp shade and popcorn box patterns on Etsy?  What do you think?

Sunday, January 20, 2013

My Paper Passion


I have loved paper since I was about four.  No one would cut out my paper dolls, so I had to learn how.  After 62 years, I still love the feel, texture, the sounds of cutting, and tearing paper.  So I have decided to post some of my paper creations.  Now, I use Corel design software, a printer that prints large format, and a Pazzles digital paper cutter, and paper, paper, paper.  I'll start with two paper cakes I have made.  I designed the patterns, so I would have to do not actual scissor cutting.  The first, I designed for a wedding table centerpiece.  I made 10, at the cost of $10 each.   The second, I made for my son's 40th birthday.  He is a Grateful Dead fan.