Easily Handmade or Digital-Cut
As you can see by my sporadic posts, I am a lazy blogger. It is not that I don't have a million ideas, maybe I have too many! I do not focus on one craft, but I cross-craft all the time. Coming from a time in my life where money was tight, I also favor cheap, efficient, and useful.
Although I absolutely love all of those beautiful, and intricate designs on sites like SVG.cuts, and the various cutting machine websites, I hate to invest all that time and money into something that is just a decoration, and not a useful, and practical design element.
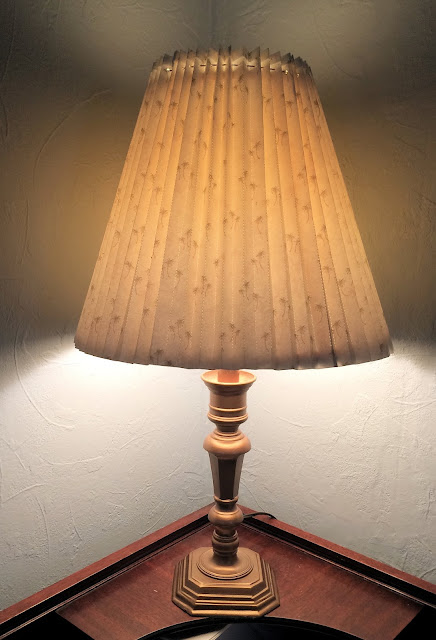
So here is an easy, practical, cheap, and easy lampshade cover-up. Although this is designed for a lampshade up to 12 inches high, you can find longer paper than scrapbook paper to make for a taller lampshade. Here is a picture of mine:
This was an old lampshade destined for the garbage. It had a torn and stained pleated cover that I tore off. A plain white-plastic lampshade was left. I took five pretty scrapbook papers, and pleated them, punched 1/8th holes in the top of each fold, over-lapped and glued the papers all into a round,
and strung some floss around the top and tied to fit.
Now I actually created a digital-cutting pattern to make mine. I just made 1/2 inch perforation lines along the folds (mountain and valleys for origami folders.) I put 1/8 inch circles along the top, and let my machine do the hard work. This is a simple design, and I think most crafters with digital-cutting machines can do this.
For those without a digital cutter, There are excellent crafting tools to create the crease lines for the mountain and valley folds, and punches for the holes. If you are into Origami, this should be a snap for you!
It cost me less that 2 dollars, if you consider how expensive shades are now, that is a real bargain!
It's just a simple design, but it's effective. You could easily change your lampshade for the holidays, or change of seasons without the high cost of buying new.
If you have some extra time, come look at my tiffany-style lampshade designs (2) on Etsy. GordonsStudio at Etsy.


